09 December 2011

Load Balancing 2 Line Speedy Dengan Mikrotik

Load Balancing 2 Line Speedy Dengan Mikrotik

Nah, ini artikel pertama saya tentang mikrotik. Pada artikel ini saya tidak akan menjelaskan apa itu mikrotik dan apa itu load balancing…Saya harap sebelum mempraktekkannya teman2 sudah paham apa dan bagaimana menggunakan mikrotik dan apa itu load balancing. Saya akan langsung masuk pada cara setting load balancing, dengan menggunakan nth. Alhamdulillah dari settingan ini saya berhasil menggabungkan 2 line speedy masing2 1 Mbps menjadi 2 Mbps. Perhatikan Topologi berikut ini:
Lanjut saja….
Pertama siapkan mikrotik RB 450  atau sebuah pc router mikrotik dengan min 3 eth(lan card/ethernet card);
Masuk dengan menggunakan winbox kemudian setting ether1,ether2 dan ether3 sbb:
Konfigurasi Ether1
isikan Address : 192.168.1.2/24
Network : 192.168.1.0
Broadcast : 192.168.1.255
Interface : ether1-Speedy1
Konfigurasi Speedy 2
isikan Address : 192.168.2.2/24
Network : 192.168.2.0
Broadcast : 192.168.2.255
Interface : ether2-Speedy2
Konfigurasi Lan
isikan Address : 192.168.17.1/24
Network : 192.168.17.0
Broadcast : 192.168.17.255
Interface : ether3-Lan
Setelah selesai melakukan konfigurasi pada ether1, ether2 dan ether3 lanjutkan untuk pembuatan mangle:
masuk ke terminal –> /ip firewall mangle kemudian enter lalu copy kan seluruh kode berikut:
add chain=prerouting in-interface=ether3-Lan  connection-state=new nth=2,1 action=mark-connection new-connection-mark=lb_1 passthrough=yes comment=”LB Client” disabled=no
add chain=prerouting in-interface= ether3-Lan  connection-mark=lb_1 action=mark-routing new-routing-mark=route_lb_1 passthrough=no comment=”" disabled=no
add chain=prerouting in-interface=ether3-Lan  connection-state=new nth=2,2 action=mark-connection new-connection-mark=lb_2 passthrough=yes comment=”" disabled=no
add chain=prerouting in-interface=ether3-Lan  connection-mark=lb_2 action=mark-routing new-routing-mark=route_lb_2 passthrough=no comment=”" disabled=no
*penting: perhatikan bagian interface nya harus sama pada bagian Lan.
lanjut lagi …masuk ke terminal lagi –> /ip firewall nat lalu enter
copy kan lagi kode dibawah ini:
add chain=srcnat out-interface=”ether1-Speedy1″ action=masquerade comment=”" disabled=no
add chain=srcnat out-interface=”ether2-Speedy2″ action=masquerade comment=”" disabled=no
lanjutkan lagi masih di terminal kemudian  /ip routes + enter dan copy lagi kode berikut:
add dst-address=0.0.0.0/0 gateway=192.168.1.1 scope=255 target-scope=10 routing-mark=route_lb_1 comment=”" disabled=no
add dst-address=0.0.0.0/0 gateway=192.168.2.1 scope=255 target-scope=10 routing-mark=route_lb_2 comment=”" disabled=no
add dst-address=0.0.0.0/0 gateway=192.168.2.1 scope=255 target-scope=10 comment=”default routing connection” disabled=no
Setelah itu masuk lagi ke IP –> Routes –> pilih yang gateway 192.168.2.1 comment “default routing” kemudian ganti distance 1 menjadi 2. Maka Load Balancingnya sudah kelar sampai disini.

06 December 2011

Load Balance menggunakan Metode PCC sumber dari mikrotik.co.id

Load Balance menggunakan Metode PCC sumber dari mikrotik.co.id

Load balance pada mikrotik adalah teknik untuk mendistribusikan beban trafik pada dua atau lebih jalur koneksi secara seimbang, agar trafik dapat berjalan optimal, memaksimalkan throughput, memperkecil waktu tanggap dan menghindari overload pada salah satu jalur koneksi.
Selama ini banyak dari kita yang beranggapan salah, bahwa dengan menggunakan loadbalance dua jalur koneksi , maka besar bandwidth yang akan kita dapatkan menjadi dua kali lipat dari bandwidth sebelum menggunakan loadbalance (akumulasi dari kedua bandwidth tersebut). Hal ini perlu kita perjelas dahulu, bahwa loadbalance tidak akan menambah besar bandwidth yang kita peroleh, tetapi hanya bertugas untuk membagi trafik dari kedua bandwidth tersebut agar dapat terpakai secara seimbang.
Dengan artikel ini, kita akan membuktikan bahwa dalam penggunaan loadbalancing tidak seperti rumus matematika 512 + 256 = 768, akan tetapi 512 + 256 = 512 + 256, atau 512 + 256 = 256 + 256 + 256.
Pada artikel ini kami menggunakan RB433UAH dengan kondisi sebagai berikut :
1.    Ether1 dan Ether2 terhubung pada ISP yang berbeda dengan besar bandwdith yang berbeda. ISP1 sebesar 512kbps dan ISP2 sebesar 256kbps.
2.    Kita akan menggunakan web-proxy internal dan menggunakan openDNS.
3.    Mikrotik RouterOS anda menggunakan versi 4.5  karena fitur PCC mulai dikenal pada versi 3.24.
Jika pada kondisi diatas berbeda dengan kondisi jaringan ditempat anda, maka konfigurasi yang akan kita jabarkan disini harus anda sesuaikan dengan konfigurasi untuk jaringan ditempat anda.

Konfigurasi Dasar

Berikut ini adalah Topologi Jaringan dan IP address yang akan kita gunakan


/ip address
add address=192.168.101.2/30 interface=ether1
add address=192.168.102.2/30 interface=ether2
add address=10.10.10.1/24 interface=wlan2
/ip dns
set allow-remote-requests=yes primary-dns=208.67.222.222 secondary-dns=208.67.220.220


Untuk koneksi client, kita menggunakan koneksi wireless pada wlan2 dengan range IP client 10.10.10.2 s/d 10.10.10.254 netmask 255.255.255.0, dimana IP 10.10.10.1 yang dipasangkan pada wlan2 berfungsi sebagai gateway dan dns server dari client. Jika anda menggunakan DNS dari salah satu isp anda, maka akan ada tambahan mangle yang akan kami berikan tanda tebal

Setelah pengkonfigurasian IP dan DNS sudah benar, kita harus memasangkan default route ke masing-masing IP gateway ISP kita agar router meneruskan semua trafik yang tidak terhubung padanya ke gateway tersebut. Disini kita menggunakan fitur check-gateway berguna jika salah satu gateway kita putus, maka koneksi akan dibelokkan ke gateway lainnya.

/ip route
add dst-address=0.0.0.0/0 gateway=192.168.101.1 distance=1 check-gateway=ping
add dst-address=0.0.0.0/0 gateway=192.168.102.1 distance=2 check-gateway=ping


Untuk pengaturan Access Point sehingga PC client dapat terhubung dengan wireless kita, kita menggunakan perintah

/interface wireless
set wlan2 mode=ap-bridge band=2.4ghz-b/g ssid=Mikrotik disabled=no


Agar pc client dapat melakukan koneksi ke internet, kita juga harus merubah IP privat client ke IP publik yang ada di interface publik kita yaitu ether1 dan ether2.

/ip firewall nat
add action=masquerade chain=srcnat out-interface=ether1
add action=masquerade chain=srcnat out-interface=ether2


Sampai langkah ini, router dan pc client sudah dapat melakukan koneksi internet. Lakukan ping baik dari router ataupun pc client ke internet. Jika belum berhasil, cek sekali lagi konfigurasi anda.

Webproxy Internal
Pada routerboard tertentu, seperti RB450G, RB433AH, RB433UAH, RB800 dan RB1100 mempunyai expansion slot (USB, MicroSD, CompactFlash) untuk storage tambahan. Pada contoh berikut, kita akan menggunakan usb flashdisk yang dipasangkan pada slot USB. Untuk pertama kali pemasangan, storage tambahan ini akan terbaca statusnya invalid di /system store. Agar dapat digunakan sebagai media penyimpan cache, maka storage harus diformat dahulu dan diaktifkan Nantinya kita tinggal mengaktifkan webproxy dan set cache-on-disk=yes untuk menggunakan media storage kita. Jangan lupa untuk membelokkan trafik HTTP (tcp port 80) kedalam webproxy kita.


/store disk format-drive usb1
/store
add disk=usb1 name=cache-usb type=web-proxy
activate cache-usb

/ip proxy
set cache-on-disk=yes enabled=yes max-cache-size=200000KiB port=8080

/ip firewall nat
add chain=dstnat protocol=tcp dst-port=80 in-interface=wlan2 action=redirect to-ports=8080


Pengaturan Mangle
Pada loadbalancing kali ini kita akan menggunakan fitur yang disebut PCC (Per Connection Classifier). Dengan PCC kita bisa mengelompokan trafik koneksi yang melalui atau keluar masuk router menjadi beberapa kelompok. Pengelompokan ini bisa dibedakan berdasarkan src-address, dst-address, src-port dan atau dst-port. Router akan mengingat-ingat jalur gateway yang dilewati diawal trafik koneksi, sehingga pada paket-paket selanjutnya yang masih berkaitan dengan koneksi awalnya akan dilewatkan  pada jalur gateway yang sama juga. Kelebihan dari PCC ini yang menjawab banyaknya keluhan sering putusnya koneksi pada teknik loadbalancing lainnya sebelum adanya PCC karena perpindahan gateway..
Sebelum membuat mangle loadbalance, untuk mencegah terjadinya loop routing pada trafik, maka semua trafik client yang menuju network yang terhubung langsung dengan router, harus kita bypass dari loadbalancing. Kita bisa membuat daftar IP yang masih dalam satu network router dan  memasang mangle pertama kali sebagai berikut


/ip firewall address-list
add address=192.168.101.0/30 list=lokal
add address=192.168.102.0/30 list=lokal
add address=10.10.10.0/24 list=lokal

/ip firewall mangle
add action=accept chain=prerouting dst-address-list=lokal in-interface=wlan2 comment=”trafik lokal”
add action=accept chain=output dst-address-list=lokal


Pada kasus tertentu, trafik pertama bisa berasal dari Internet, seperti penggunaan remote winbox atau telnet dari internet dan sebagainya, oleh karena itu kita juga memerlukan mark-connection untuk menandai trafik tersebut agar trafik baliknya juga bisa melewati interface dimana trafik itu masuk

/ip firewall mangle
add action=mark-connection chain=prerouting connection-mark=no-mark in-interface=ether1 new-connection-mark=con-from-isp1 passthrough=yes comment=”trafik dari isp1”
add action=mark-connection chain=prerouting connection-mark=no-mark in-interface=ether2 new-connection-mark=con-from-isp2 passthrough=yes comment=”trafik dari isp2”


Umumnya, sebuah ISP akan membatasi akses DNS servernya dari IP yang hanya dikenalnya, jadi jika anda menggunakan DNS dari salah satu ISP anda, anda harus menambahkan mangle agar trafik DNS tersebut melalui gateway ISP yang bersangkutan bukan melalui gateway ISP lainnya. Disini kami berikan mangle DNS ISP1 yang melalui gateway ISP1. Jika anda menggunakan publik DNS independent, seperti opendns, anda tidak memerlukan mangle dibawah ini.

/ip firewall mangle
add action=mark-connection chain=output comment=dns dst-address=202.65.112.21 dst-port=53 new-connection-mark=dns passthrough=yes protocol=tcp comment=”trafik DNS citra.net.id”
add action=mark-connection chain=output dst-address=202.65.112.21 dst-port=53 new-connection-mark=dns passthrough=yes protocol=udp
add action=mark-routing chain=output connection-mark=dns new-routing-mark=route-to-isp1 passthrough=no


Karena kita menggunakan webproxy pada router, maka trafik yang perlu kita loadbalance ada 2 jenis. Yang pertama adalah trafik dari client menuju internet (non HTTP), dan trafik dari webproxy menuju internet. Agar lebih terstruktur dan mudah dalam pembacaannya, kita akan menggunakan custom-chain sebagai berikut :

/ip firewall mangle
add action=jump chain=prerouting comment=”lompat ke client-lb” connection-mark=no-mark in-interface=wlan2 jump-target=client-lb
add action=jump chain=output comment=”lompat ke lb-proxy” connection-mark=no-mark out-interface=!wlan2 jump-target=lb-proxy


Pada mangle diatas, untuk trafik loadbalance client pastikan parameter in-interface adalah interface yang terhubung dengan client, dan untuk trafik loadbalance webproxy, kita menggunakan chain output dengan parameter out-interface yang bukan terhubung ke interface client. Setelah custom chain untuk loadbalancing dibuat, kita bisa membuat mangle di custom chain tersebut sebagai berikut

/ip firewall mangle
add action=mark-connection chain=client-lb dst-address-type=!local new-connection-mark=to-isp1 passthrough=yes per-connection-classifier=both-addresses:3/0 comment=”awal loadbalancing klien”
add action=mark-connection chain=client-lb dst-address-type=!local new-connection-mark=to-isp1 passthrough=yes per-connection-classifier=both-addresses:3/1
add action=mark-connection chain=client-lb dst-address-type=!local new-connection-mark=to-isp2 passthrough=yes per-connection-classifier=both-addresses:3/2
add action=return chain=client-lb comment=”akhir dari loadbalancing”

/ip firewall mangle
add action=mark-connection chain=lb-proxy dst-address-type=!local new-connection-mark=con-from-isp1 passthrough=yes per-connection-classifier=both-addresses:3/0 comment=”awal load balancing proxy”
add action=mark-connection chain=lb-proxy dst-address-type=!local new-connection-mark=con-from-isp1 passthrough=yes per-connection-classifier=both-addresses:3/1
add action=mark-connection chain=lb-proxy dst-address-type=!local new-connection-mark=con-from-isp2 passthrough=yes per-connection-classifier=both-addresses:3/2
add action=return chain=lb-proxy comment=”akhir dari loadbalancing”


Untuk contoh diatas, pada loadbalancing client dan webproxy menggunakan parameter pemisahan trafik pcc yang sama, yaitu both-address, sehingga router akan mengingat-ingat berdasarkan src-address dan dst-address dari sebuah koneksi. Karena trafik ISP kita yang berbeda (512kbps dan 256kbps), kita membagi beban trafiknya menjadi 3 bagian. 2 bagian pertama akan melewati gateway ISP1, dan 1 bagian terakhir akan melewati gateway ISP2. Jika masing-masing trafik dari client dan proxy sudah ditandai, langkah berikutnya kita tinggal membuat mangle mark-route yang akan digunakan dalam proses routing nantinya

/ip firewall mangle
add action=jump chain=prerouting comment=”marking route client” connection-mark=!no-mark in-interface=wlan2 jump-target=route-client
add action=mark-routing chain=route-client connection-mark=to-isp1 new-routing-mark=route-to-isp1 passthrough=no
add action=mark-routing chain=route-client connection-mark=to-isp2 new-routing-mark=route-to-isp2 passthrough=no
add action=mark-routing chain=route-client connection-mark=con-from-isp1 new-routing-mark=route-to-isp1 passthrough=no
add action=mark-routing chain=route-client connection-mark=con-from-isp2 new-routing-mark=route-to-isp2 passthrough=no
add action=return chain=route-client disabled=no

/ip firewall mangle
add action=mark-routing chain=output comment=”marking route proxy” connection-mark=con-from-isp1 new-routing-mark=route-to-isp1 out-interface=!wlan2 passthrough=no
add action=mark-routing chain=output connection-mark=con-from-isp2 new-routing-mark=route-to-isp2 out-interface=!wlan2 passthrough=no


Pengaturan Routing
Pengaturan mangle diatas tidak akan berguna jika anda belum membuat routing berdasar mark-route yang sudah kita buat. Disini kita juga akan membuat routing backup, sehingga apabila sebuah gateway terputus, maka semua koneksi akan melewati gateway yang masing terhubung


/ip route
add check-gateway=ping dst-address=0.0.0.0/0 gateway=192.168.101.1 routing-mark=route-to-isp1 distance=1
add check-gateway=ping dst-address=0.0.0.0/0 gateway=192.168.102.1 routing-mark=route-to-isp1 distance=2
add check-gateway=ping dst-address=0.0.0.0/0 gateway=192.168.102.1 routing-mark=route-to-isp2 distance=1
add check-gateway=ping dst-address=0.0.0.0/0 gateway=192.168.101.1 routing-mark=route-to-isp2 distance=2


Pengujian

Dari hasil pengujian kami, didapatkan sebagai berikut

Dari gambar terlihat, bahwa hanya dengan melakukan 1 file download (1 koneksi), kita hanya mendapatkan speed 56kBps (448kbps) karena pada saat itu melewati gateway ISP1, sedangkan jika kita mendownload file (membuka koneksi baru) lagi pada web lain, akan mendapatkan 30kBps (240kbps). Dari pengujian ini terlihat dapat disimpulkan bahwa

512kbps + 256kbps ≠ 768kbps
Catatan :
* Loadbalancing menggunakan teknik pcc ini akan berjalan efektif dan mendekati seimbang jika semakin banyak koneksi (dari client) yang terjadi.
* Gunakan ISP yang memiliki bandwith FIX bukan Share untuk mendapatkan hasil yang lebih optimal.
* Load Balance menggunakan PCC ini bukan selamanya dan sepenuhnya sebuah solusi yang pasti berhasil baik di semua jenis network, karena proses penyeimbangan dari traffic adalah berdasarkan logika probabilitas. 

05 December 2011

Load Balancing + Proxy Eksternal (Game Poker & Poinblank)

Load Balancing + Proxy Eksternal (Game Poker & Poinblank)

tutorial ini sebagai catatan pribadi saya, semoga dapat menjawab banyak pertanyaan mengenai kendala Game Online terutama PB & Poker pada Load Balancing.

bahan :
- RB750 VER 4.9
- 2 Line Speedy Paket Office
- Ubuntu Versi 10.04

SET DI MIKROTIK :

/ip adrress
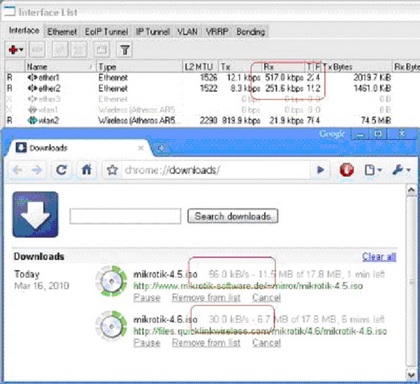
- 172.19.196.1/24 interface proxy
- 192.168.88.1/24 interface lan
- 192.168.1.1/24 interface modem-1
- 192.168.2.1/24 interface modem-2

catatan : - dial lewat mikrotik dgn modem sbg brigde
- ip mesin ubuntu 172.19.196.100


PROXY HIT
/ip firewall mangle
add action=mark-packet chain=prerouting comment=proxy-hit disabled=no dscp=12 \
new-packet-mark=proxy-hit passthrough=yes

/queue tree
add burst-limit=0 burst-threshold=0 burst-time=0s disabled=no limit-at=0 \
max-limit=0 name=HIT packet-mark=proxy-hit parent=global-out priority=1 \
queue=default

PCC RULE MARK ALL PPPoE CONN

/ip firewall mangle
add action=mark-connection chain=input comment=\
"PCC RULE ---- MARK ALL PPPoE CONN" connection-state=new disabled=no \
in-interface=pppoe_1 new-connection-mark=pppoe1_conn passthrough=yes

add action=mark-connection chain=input comment="" connection-state=new \
disabled=no in-interface=pppoe_2 new-connection-mark=pppoe2_conn \
passthrough=yes

add action=mark-connection chain=prerouting comment="" connection-state=\
established disabled=no in-interface=pppoe_1 new-connection-mark=\
pppoe1_conn passthrough=yes

add action=mark-connection chain=prerouting comment="" connection-state=\
established disabled=no in-interface=pppoe_2 new-connection-mark=\
pppoe2_conn passthrough=yes

add action=mark-connection chain=prerouting comment="" connection-state=\
related disabled=no in-interface=pppoe_1 new-connection-mark=pppoe1_conn \
passthrough=yes

add action=mark-connection chain=prerouting comment="" connection-state=\
related disabled=no in-interface=pppoe_2 new-connection-mark=pppoe2_conn \
passthrough=yes

add action=mark-routing chain=output comment="" connection-mark=pppoe1_conn \
disabled=no new-routing-mark=pppoe_1 passthrough=no

add action=mark-routing chain=output comment="" connection-mark=pppoe2_conn \
disabled=no new-routing-mark=pppoe_2 passthrough=no

PCC RULE MARK HTTP CONN
/ip firewall mangle
add action=mark-connection chain=prerouting comment=\
"PCC RULE MARK HTTP CONN" connection-state=established disabled=no \
dst-address-type=!local dst-port=80 in-interface=proxy \
new-connection-mark=http_pppoe_1 passthrough=yes \
per-connection-classifier=both-addresses-and-ports:2/0 protocol=tcp

add action=mark-connection chain=prerouting comment="" connection-state=\
established disabled=no dst-address-type=!local dst-port=80 in-interface=\
proxy new-connection-mark=http_pppoe_2 passthrough=yes \
per-connection-classifier=both-addresses-and-ports:2/1 protocol=tcp

add action=mark-connection chain=prerouting comment="" connection-state=\
related disabled=no dst-address-type=!local dst-port=80 in-interface=\
proxy new-connection-mark=http_pppoe_1 passthrough=yes \
per-connection-classifier=both-addresses-and-ports:2/0 protocol=tcp

add action=mark-connection chain=prerouting comment="" connection-state=\
related disabled=no dst-address-type=!local dst-port=80 in-interface=\
proxy new-connection-mark=http_pppoe_2 passthrough=yes \
per-connection-classifier=both-addresses-and-ports:2/1 protocol=tcp

PCC RULE MARK NON HTTP CONN
/ip firewall mangle
add action=mark-connection chain=prerouting comment=\
"PCC RULE ---- MARK - NON -HTTP CONN" connection-state=established \
disabled=no dst-address-type=!local dst-port=!80 in-interface=lan \
new-connection-mark=non.http_pppoe_1 passthrough=yes \
per-connection-classifier=both-addresses-and-ports:2/0 protocol=tcp

add action=mark-connection chain=prerouting comment="" connection-state=\
established disabled=no dst-address-type=!local dst-port=!80 \
in-interface=lan new-connection-mark=non.http_pppoe_2 passthrough=yes \
per-connection-classifier=both-addresses-and-ports:2/1 protocol=tcp

add action=mark-connection chain=prerouting comment="" connection-state=\
related disabled=no dst-address-type=!local dst-port=!80 in-interface=lan \
new-connection-mark=non.http_pppoe_1 passthrough=yes \
per-connection-classifier=both-addresses-and-ports:2/0 protocol=tcp

add action=mark-connection chain=prerouting comment="" connection-state=\
related disabled=no dst-address-type=!local dst-port=!80 in-interface=lan \
new-connection-mark=non.http_pppoe_2 passthrough=yes \
per-connection-classifier=both-addresses-and-ports:2/1 protocol=tcp

add action=mark-connection chain=prerouting comment="" connection-state=\
established disabled=no dst-address-type=!local in-interface=lan \
new-connection-mark=non.http_pppoe_1 passthrough=yes \
per-connection-classifier=both-addresses-and-ports:2/0 protocol=udp

add action=mark-connection chain=prerouting comment="" connection-state=\
established disabled=no dst-address-type=!local in-interface=lan \
new-connection-mark=non.http_pppoe_2 passthrough=yes \
per-connection-classifier=both-addresses-and-ports:2/1 protocol=udp

add action=mark-connection chain=prerouting comment="" connection-state=\
related disabled=no dst-address-type=!local in-interface=lan \
new-connection-mark=non.http_pppoe_1 passthrough=yes \
per-connection-classifier=both-addresses-and-ports:2/0 protocol=udp

add action=mark-connection chain=prerouting comment="" connection-state=\
related disabled=no dst-address-type=!local in-interface=lan \
new-connection-mark=non.http_pppoe_2 passthrough=yes \
per-connection-classifier=both-addresses-and-ports:2/1 protocol=udp

PCC RULE MARK HTTP dan NON HTTP ROUTE
/ip firewall mangle
add action=mark-routing chain=prerouting comment=\
"PCC RULE ---- MARK - HTTP ROUTE" connection-mark=http_pppoe_1 disabled=\
no new-routing-mark=pppoe_1 passthrough=yes

add action=mark-routing chain=prerouting comment="" connection-mark=\
http_pppoe_2 disabled=no new-routing-mark=pppoe_2 passthrough=yes

add action=mark-routing chain=prerouting comment=\
"PCC RULE MARK NON HTTP ROUTE" connection-mark=non.http_pppoe_1 \
disabled=no new-routing-mark=pppoe_1 passthrough=yes

add action=mark-routing chain=prerouting comment="" connection-mark=\
non.http_pppoe_2 disabled=no new-routing-mark=pppoe_2 passthrough=yes

NAT
/ip firewall nat
add action=masquerade chain=srcnat comment=MASQUERADE1 disabled=no \
out-interface=pppoe_1

add action=masquerade chain=srcnat comment=MASQUERADE2 disabled=no \
out-interface=pppoe_2

add action=masquerade chain=srcnat comment=MASQUERADE3 disabled=no \
out-interface=proxy

add action=dst-nat chain=dstnat comment=TRANSPARENT-DNS disabled=no dst-port=\
53 in-interface=lan protocol=udp to-ports=53

add action=dst-nat chain=dstnat comment="" disabled=no dst-port=53 \
in-interface=lan protocol=tcp to-ports=53

add action=dst-nat chain=dstnat comment="" disabled=no dst-port=53 \
in-interface=proxy protocol=udp to-ports=53

add action=dst-nat chain=dstnat comment="" disabled=no dst-port=53 \
in-interface=proxy protocol=tcp to-ports=53

add action=dst-nat chain=dstnat comment=TRANSPARENT-proxy disabled=no \
dst-address-list=!proxyNET dst-port=80,8080,3128 in-interface=lan \
protocol=tcp to-addresses=172.19.196.100 to-ports=3128

add action=dst-nat chain=dstnat comment="REMOTE PROXY" disabled=no \
dst-address=125.165.40.xxx dst-port=22 protocol=tcp to-addresses=\
172.19.196.100 to-ports=22
ADDRESS LIST
/ip firewall address-list
add address=192.168.88.0/24 comment="" disabled=no list=lanNET
add address=172.19.196.0/24 comment="" disabled=no list=proxyNET

ROUTE
/ip route
add check-gateway=ping disabled=no distance=1 dst-address=0.0.0.0/0 gateway=\
pppoe_1 routing-mark=pppoe_1 scope=30 target-scope=10
add check-gateway=ping disabled=no distance=1 dst-address=0.0.0.0/0 gateway=\
pppoe_2 routing-mark=pppoe_2 scope=30 target-scope=10
add check-gateway=ping comment=Default-Route-pppoe1-Distance-1 disabled=no \
distance=1 dst-address=0.0.0.0/0 gateway=pppoe_1 scope=30 target-scope=10
add check-gateway=ping comment=Default-Route-pppoe2-Distance-2 disabled=no \
distance=2 dst-address=0.0.0.0/0 gateway=pppoe_2 scope=30 target-scope=10
Kita lanjut pada Bagian proxy-nya

Partisi HDD

Dari harddisk 160Gb dibagi sebagai berikut:
/boot 1Gb ext4 Boot Flag Boot
/ 3Gb ext4 System
/usr 4Gb ext4 Static Variable
/var 4Gb ext4 Variable
swap 1Gb swap (1 x besaran RAM)
/home/proxy1 10 Gb /ReiserFS
/home/proxy2 10 Gb /ReiserFS
/home/proxy3 10 Gb /ReiserFS
/home/share (sisanya) ext4 Share Documents

Install Paket
- sudo apt-get update
- sudo apt-get install squid
- sudo apt-get install squid squidclient squid-cgi
- sudo apt-get install ccze
setelah selesai install paket lakukan edit squid.conf
dgn lokasi : /etc/squid/squid.conf

menjadi :
SQUID.CONF

# Proxy Server Versi 2.7.Stable6
# by teukurizal@yahoo.com.sg
# update 11 Juni 2010
#-----------------------------------#

#---------------------------------------------------------------#
# Port
#---------------------------------------------------------------#

http_port 3128 transparent
icp_port 3130
prefer_direct off

#---------------------------------------------------------------#
# Mengatasi Facebook Blank setelah login
#---------------------------------------------------------------#

server_http11 on

#---------------------------------------------------------------#
# Cache & Object
#---------------------------------------------------------------#

cache_mem 8 MB
cache_swap_low 98
cache_swap_high 99
max_filedesc 8192
maximum_object_size 128 MB
minimum_object_size 0 KB
maximum_object_size_in_memory 128 KB

ipcache_size 10240
ipcache_low 98
ipcache_high 99
fqdncache_size 4096
cache_replacement_policy heap LFUDA
memory_replacement_policy heap GDSF

#----------------------------------------------------------------#
# cache_dir
#----------------------------------------------------------------#

cache_dir aufs /home/proxy1 7000 16 256
cache_dir aufs /home/proxy2 7000 16 256
cache_dir aufs /home/proxy3 7000 16 256

cache_access_log /var/log/squid/access.log
cache_log /var/log/squid/cache.log
cache_store_log none
pid_filename /var/run/squid.pid
cache_swap_log /var/log/squid/swap.state
dns_nameservers /etc/resolv.conf
emulate_httpd_log off
hosts_file /etc/hosts
half_closed_clients off
negative_ttl 1 minutes

#---------------------------------------------------------------#
# Rules: Safe Port
#---------------------------------------------------------------#

acl all src 0.0.0.0/0.0.0.0
acl manager proto cache_object
acl localhost src 127.0.0.1/255.255.255.255
acl to_localhost dst 127.0.0.0/8
acl SSL_ports port 443 563 873 # https snews rsync
acl Safe_ports port 80 # http
acl Safe_ports port 20 21 # ftp
acl Safe_ports port 70 # gopher
acl Safe_ports port 210 # wais
acl Safe_ports port 1025-65535 # unregistered ports
acl Safe_ports port 631 # cups
acl Safe_ports port 10000 # webmin
acl Safe_ports port 901 # SWAT
acl Safe_ports port 280 # http-mgmt
acl Safe_ports port 488 # gss-http
acl Safe_ports port 591 # filemaker
acl Safe_ports port 777 # multiling http
acl Safe_ports port 873 # rsync
acl Safe_ports port 110 # POP3
acl Safe_ports port 25 # SMTP
acl Safe_ports port 2095 2096 # webmail from cpanel
acl Safe_ports port 2082 2083 # cpanel

acl purge method PURGE
acl CONNECT method CONNECT
http_access allow manager localhost
http_access deny manager
http_access allow purge localhost
http_access deny purge
http_access deny !Safe_ports !SSL_ports
http_access deny CONNECT !SSL_ports !Safe_ports

#---------------------------------------------------------------#
# Refresh Pattern
#---------------------------------------------------------------#

# pictures & images
refresh_pattern -i \.(gif|png|jpeg|jpg|bmp|tif|tiff|ico)$ 10080 50% 43200 override-expire override-lastmod reload-into-ims ignore-reload ignore-no-cache ignore-auth ignore-private
refresh_pattern -i \.(xml|html|htm|js|txt|css|php)$ 10080 50% 43200 override-expire override-lastmod reload-into-ims ignore-reload ignore-no-cache ignore-auth

#sound, video multimedia
refresh_pattern -i \.(flv|x-flv|mov|avi|qt|mpg|mpeg|swf)$ 10080 50% 43200 override-expire override-lastmod reload-into-ims ignore-reload ignore-no-cache
refresh_pattern -i \.(wav|mp3|mp4|au|mid)$ 10080 50% 43200 override-expire override-lastmod reload-into-ims ignore-reload ignore-no-cache ignore-auth ignore-private

# files
refresh_pattern -i \.(iso|deb|rpm|zip|tar|tgz|ram|rar|bin|ppt|doc)$ 10080 90% 43200 ignore-no-cache ignore-auth
refresh_pattern -i \.(zip|gz|arj|lha|lzh)$ 10080 100% 43200 override-expire ignore-no-cache ignore-auth
refresh_pattern -i \.(rar|tgz|tar|exe|bin)$ 10080 100% 43200 override-expire ignore-no-cache ignore-auth
refresh_pattern -i \.(hqx|pdf|rtf|doc|swf)$ 10080 100% 43200 override-expire ignore-no-cache ignore-auth
refresh_pattern -i \.(inc|cab|ad|txt|dll)$ 10080 100% 43200 override-expire ignore-no-cache ignore-auth

# -- refresh pattern for specific sites -- #
refresh_pattern ^http://*.jobstreet.com.*/.* 720 100% 10080 override-expire override-lastmod ignore-no-cache
refresh_pattern ^http://*.indowebster.com.*/.* 720 100% 10080 override-expire override-lastmod reload-into-ims ignore-reload ignore-no-cache ignore-auth
refresh_pattern ^http://*.21cineplex.*/.* 720 100% 10080 override-expire override-lastmod reload-into-ims ignore-reload ignore-no-cache ignore-auth
refresh_pattern ^http://*.atmajaya.*/.* 720 100% 10080 override-expire ignore-no-cache ignore-auth
refresh_pattern ^http://*.kompas.*/.* 720 100% 10080 override-expire override-lastmod reload-into-ims ignore-no-cache ignore-auth
refresh_pattern ^http://*.theinquirer.*/.* 720 100% 10080 override-expire ignore-no-cache ignore-auth
refresh_pattern ^http://*.blogspot.com/.* 720 100% 10080 override-expire override-lastmod reload-into-ims ignore-no-cache ignore-auth
refresh_pattern ^http://*.wordpress.com/.* 720 100% 10080 override-expire override-lastmod reload-into-ims ignore-no-cache
refresh_pattern ^http://*.photobucket.com/.* 720 100% 10080 override-expire override-lastmod reload-into-ims ignore-no-cache ignore-auth
refresh_pattern ^http://*.tinypic.com/.* 720 100% 10080 override-expire override-lastmod reload-into-ims ignore-no-cache ignore-auth
refresh_pattern ^http://*.imageshack.us/.* 720 100% 10080 override-expire override-lastmod reload-into-ims ignore-no-cache ignore-auth
refresh_pattern ^http://*.kaskus.*/.* 720 100% 28800 override-expire override-lastmod reload-into-ims ignore-no-cache ignore-auth
refresh_pattern ^http://www.kaskus.com/.* 720 100% 28800 override-expire override-lastmod reload-into-ims ignore-no-cache ignore-auth
refresh_pattern ^http://*.detik.*/.* 720 50% 2880 override-expire override-lastmod reload-into-ims ignore-no-cache ignore-auth
refresh_pattern ^http://*.detiknews.*/*.* 720 50% 2880 override-expire override-lastmod reload-into-ims ignore-no-cache ignore-auth
refresh_pattern ^http://video.liputan6.com/.* 720 100% 10080 override-expire override-lastmod reload-into-ims ignore-no-cache ignore-auth
refresh_pattern ^http://static.liputan6.com/.* 720 100% 10080 override-expire override-lastmod reload-into-ims ignore-no-cache ignore-auth
refresh_pattern ^http://*.friendster.com/.* 720 100% 10080 override-expire override-lastmod ignore-no-cache ignore-auth
refresh_pattern ^http://*.facebook.com/.* 720 100% 10080 override-expire override-lastmod reload-into-ims ignore-no-cache ignore-auth
refresh_pattern ^http://apps.facebook.com/.* 720 100% 10080 override-expire override-lastmod reload-into-ims ignore-no-cache ignore-auth
refresh_pattern ^http://*.fbcdn.net/.* 720 100% 10080 override-expire override-lastmod reload-into-ims ignore-no-cache ignore-auth
refresh_pattern ^http://profile.ak.fbcdn.net/.* 720 100% 10080 override-expire override-lastmod reload-into-ims ignore-no-cache ignore-auth
refresh_pattern ^http://static.playspoon.com/.* 720 100% 10080 override-expire override-lastmod reload-into-ims ignore-no-cache ignore-auth
refresh_pattern ^http://cooking.game.playspoon.com/.* 720 100% 10080 override-expire override-lastmod reload-into-ims ignore-no-cache ignore-auth
refresh_pattern -i http://[^a-z\.]*onemanga\.com/? 720 80% 10080 override-expire override-lastmod reload-into-ims ignore-no-cache ignore-auth
refresh_pattern ^http://media?.onemanga.com/.* 720 80% 10080 override-expire override-lastmod reload-into-ims ignore-no-cache ignore-auth
refresh_pattern ^http://*.yahoo.com/.* 720 80% 10080 override-expire override-lastmod reload-into-ims ignore-no-cache ignore-auth
refresh_pattern ^http://*.google.com/.* 720 80% 10080 override-expire override-lastmod reload-into-ims ignore-no-cache ignore-auth
refresh_pattern ^http://*.forummikrotik.com/.* 720 80% 10080 override-expire override-lastmod reload-into-ims ignore-no-cache ignore-auth
refresh_pattern ^http://*.linux.or.id/.* 720 100% 10080 override-expire override-lastmod reload-into-ims ignore-no-cache ignore-auth

#default option
refresh_pattern ^ftp: 1440 20% 10080
refresh_pattern ^gopher: 1440 0% 1440
refresh_pattern -i (/cgi-bin/|\?) 0 0% 0
refresh_pattern . 0 20% 4320

#---------------------------------------------------------------#
# ALLOWED ACCESS
#---------------------------------------------------------------#

acl proxyku src 172.19.196.0/24
http_access allow proxyku
http_access allow localhost
http_access deny all
http_reply_access allow all
icp_access allow proxyku
icp_access allow localhost
icp_access deny all
always_direct deny all

#---------------------------------------------------------------#
# Cache CGI & Administrative
#---------------------------------------------------------------#

cache_mgr teukurizal@yahoo.com.sg
visible_hostname dns.proxyku.net
cache_effective_user proxy
cache_effective_group proxy
coredump_dir /var/spool/squid
shutdown_lifetime 10 seconds
logfile_rotate 14

#-----------------------------------------------------------------#
#tcp_outgoing_tos 0x30 localnet
#-----------------------------------------------------------------#

zph_mode tos
zph_local 0x30
zph_parent 0
zph_option 136

Langkah berikut nya :
stop squid dgn perintah "squid stop"
Memberikan permission pada folder cache
chown -R proxy.proxy /home/proxy
chown proxy.proxy /var/log/squid/access.log

Membuat folder-folder swap/cache di dalam folder cache yang telah ditentukan
squid -f /etc/squid/squid.conf -z

Restart squid.
squid restart
Menggabungkan 2 Line Speedy +proxy

Menggabungkan 2 Line Speedy +proxy

 setting LB+ipcop di V3.30....
setting di bawa ini v3.20...apa bisa di modif jadi sperti master akangan punya..tq dolo ee

Flags: X - disabled, D - dynamic, R - running
# NAME TYPE RX-RATE TX-RATE MTU
0 R local ether 0 0 1500
1 R speedy1 ether 0 0 1500
2 R speedy2 ether 0 0 1500
3 R squidproxy ether 0 0 1500

IP Address

Flags: X - disabled, I - invalid, D - dynamic
# ADDRESS NETWORK BROADCAST INTERFACE
0 192.168.0.50/24 192.168.0.0 192.168.0.255 local
1 192.168.1.2/24 192.168.1.0 192.168.1.255 speedy1
2 192.168.2.2/24 192.168.2.0 192.168.2.255 speedy2
3 192.168.3.5/24 192.168.3.0 192.168.3.255 squidproxy

Mangle

Flags: X - disabled, I - invalid, D - dynamic
0 ;;; Mangle Squid
chain=forward content=X-Cache: HIT action=mark-connection new-connection-mark=squid_con
passthrough=yes

1 chain=forward connection-mark=squid_con action=mark-packet new-packet-mark=squid_pkt
passthrough=no

2 ;;; LB Squid
chain=prerouting connection-mark=!squid_con connection-state=new nth=1,1,0
action=mark-connection new-connection-mark=line1 passthrough=yes

3 chain=prerouting connection-mark=line1 action=mark-routing new-routing-mark=route-line1
passthrough=no

4 chain=prerouting connection-mark=squid_con connection-state=new nth=1,1,1
action=mark-connection new-connection-mark=line2 passthrough=yes

5 chain=prerouting connection-mark=line2 action=mark-routing new-routing-mark=route-line2
passthrough=no

6 ;;; Mangle Squid
chain=forward connection-mark=!squid_con action=mark-packet new-packet-mark=http_pkt
passthrough=no

7 chain=forward protocol=icmp connection-mark=all_con action=mark-packet
new-packet-mark=icmp_pkt passthrough=no

8 chain=forward connection-mark=all_con action=mark-packet new-packet-mark=test_pkt
passthrough=no

NAT

Flags: X - disabled, I - invalid, D - dynamic
0 ;;; Masquerade
chain=srcnat out-interface=speedy1 action=masquerade

1 chain=srcnat out-interface=speedy2 action=masquerade

2 ;;; Untuk IP Cop
chain=dstnat protocol=tcp dst-port=81 action=dst-nat to-addresses=192.168.3.1 to-ports=81

3 X ;;; Untuk HTTPS IPCOP
chain=dstnat protocol=tcp dst-port=445 action=dst-nat to-addresses=192.168.3.1 to-ports=445

4 ;;; Redirect Mik to Squid
chain=dstnat src-address=!192.168.3.0/24 protocol=tcp dst-port=80 action=dst-nat
to-addresses=192.168.3.1 to-ports=878

5 X chain=dstnat src-address=!192.168.3.0/24 protocol=tcp dst-port=443 action=dst-nat
to-addresses=192.168.3.1 to-ports=800

IP Route

Flags: X - disabled, A - active, D - dynamic,
C - connect, S - static, r - rip, b - bgp, o - ospf
# DST-ADDRESS PREF-SRC G GATEWAY DISTANCE INTERFACE
0 ADC 192.168.0.0/24 192.168.0.50 local
1 ADC 192.168.1.0/24 192.168.1.2 speedy1
2 ADC 192.168.2.0/24 192.168.2.2 speedy2
3 ADC 192.168.3.0/24 192.168.3.5 squidproxy
4 A S ;;; default routing connection
0.0.0.0/0 r 192.168.1.1 speedy1
5 A S 0.0.0.0/0 r 192.168.1.1 speedy1
6 A S 0.0.0.0/0 r 192.168.2.1 speedy2


atau pakai setingan yang ini


Load balancing Mikrotik kali ini saya coba dengan 2 line speedy digabungkan dengan mesin squid web proxy, berbeda dengan load balancing versi sebelum ini. Pada load balancing kali ini saya tambahkan redirect ke squid dengan mengunakan mikrotik sebagai mesin load balancer-nya.
Langkah pertama install dulu mikrotik seperti di tutorial ini, lalu sebelum mencoba, saya sarankan mereset mikrotik dulu, supaya kembali pada settingan default. untuk reset bisa menggunkan perintah : “/sy reset“.
Setelah Mikrotik diinstall, pastikan dulu bahwa interface pada mikrotik ada 4biji, interface 1 menuju ke klient, interface 2 menuju ke Speedy 1, interface 3 menuju ke speedy 2 dan interface 4 menuju ke squid web proxy.
untuk setting squid bisa dilihat disini, dan baiklah kita mulai copy paste setting dibawah ini pada terminal Mikrotik :
/in ethset ether1 name="intranet"  disabled=no
set ether2 name="speedy-1"  disabled=no
set ether3 name="speedy-2"  disabled=no
set ether4 name="proxy"  disabled=no
/ip addadd address=192.168.1.2/24 interface=speedy-1 comment="ke speedy-1"
add address=192.168.2.2/24 interface=speedy-2 comment="ke speedy-2"
add address=192.168.11.1/27 interface=intranet comment="ke Hub"
add address=192.168.10.2/30 interface=proxy comment="ke-proxy"
/ ip dnsset primary-dns=202.134.1.10 secondary-dns=202.134.0.155 allow-remote-requests=yes cache-size=4048KiB cache-max-ttl=1w
/ ip firewall mangleadd chain=prerouting in-interface=intranet connection-state=new nth=1,2,0 action=mark-connection new-connection-mark=satu passthrough=yes comment=""
add chain=prerouting in-interface=intranet connection-mark=satu action=mark-routing new-routing-mark=satu passthrough=no comment=""
add chain=prerouting in-interface=intranet connection-state=new nth=1,2,1 action=mark-connection new-connection-mark=dua passthrough=yes comment=""
add chain=prerouting in-interface=intranet connection-mark=dua action=mark-routing new-routing-mark=dua passthrough=no comment="" disabled=no
add chain=prerouting in-interface=proxy connection-state=new nth=1,2,0 action=mark-connection new-connection-mark=tiga passthrough=yes comment=""
add chain=prerouting in-interface=proxy connection-mark=tiga action=mark-routing new-routing-mark=tiga passthrough=no comment=""
add chain=prerouting in-interface=proxy connection-state=new nth=1,2,1 action=mark-connection new-connection-mark=empat passthrough=yes comment=""
add chain=prerouting in-interface=proxy connection-mark=empat action=mark-routing new-routing-mark=empat passthrough=no comment="" disabled=no
/ ip firewall natadd chain=srcnat out-interface=speedy-1 connection-mark=satu action=src-nat to-addresses=192.168.1.1 to-ports=0-65535 comment="" disabled=no
add chain=srcnat out-interface=speedy-2 connection-mark=dua action=src-nat to-addresses=192.168.2.1 to-ports=0-65535 comment="" disabled=no
nat add chain=dstnat protocol=tcp dst-port=80 action=redirect to-ports=3128
add chain=dstnat protocol=tcp dst-port=3128 action=redirect to-ports=3128
add chain=dstnat protocol=tcp dst-port=8080 action=redirect to-ports=3128
/ ip firewall connection trackingset enabled=yes tcp-syn-sent-timeout=2s tcp-syn-received-timeout=2s tcp-established-timeout=1d tcp-fin-wait-timeout=5s tcp-close-wait-timeout=5s tcp-last-ack-timeout=5s tcp-time-wait-timeout=5s tcp-close-timeout=5s udp-timeout=5s udp-stream-timeout=1m icmp-timeout=5s generic-timeout=5m tcp-syncookie=no
/ ip routeadd dst-address=0.0.0.0/0 gateway=192.168.1.1 scope=255 target-scope=10 routing-mark=satu comment="" disabled=no
add dst-address=0.0.0.0/0 gateway=192.168.2.1 scope=255 target-scope=10 routing-mark=dua comment="" disabled=no
add dst-address=0.0.0.0/0 gateway=192.168.1.1 scope=255 target-scope=10
/ ip proxyset enabled=yes port=3128 parent-proxy=192.168.10.1:3128 maximal-client-connecions=1000 maximal-server-connectons=1000
Ohya mikrotik yang saya gunakan untuk testing kali ini adalah versi bajakan 2.9.27, untuk versi 3 keatas silahkan lihat setting mangle-nya pada tulisan ini dan tulisan ini. ohya kalo pake bajakan saya sarankan setelah settingannya berjalan, silahkan beli Mikrotik ASLI ya!!

Menggabungkan 2 Line Speedy


Ip Modem
line1(speedy1)=192.168.1.1
line2(speedy2)=192.168.2.1
ip pc router
Local(LAN) = 192.168.0.1
Line1(speedy1)=192.168.1.2
line2(speedy2)=192.168.2.2
Mengganti Nama Ethernet pada PC Router
[admin@MikroTik] interface> pr
[admin@MikroTik] interface> set 0 name local
[admin@MikroTik] interface> set 1 name line1
[admin@MikroTik] interface> set 2 name line2
Memberikan IP


bisa juga pakai yang ini


 perhatikan gambar dibawah ini :


keterangan : - speedy 1 ip 192.168.1.1 - speedy 2 ip 192.168.2.1 - mikrotik RB433 ip 192.168.10.1 (ip jaringan lokal) dan berikut adalah konfigurasi pada mikrotik nya : yang ini juga setingan untuk mengabungkan 2 line speedy  Load Balance with Mikrotik
IP Addresses As routing decision is already made we just need rules that will fix src-addresses for all outgoing packets. If this packet will leave via wlan1 it will be NATed to 10.112.0.2, if via wlan2 then NATed to 10.111.0.2
Load Balancing over Multiple Gateways

Load Balancing over Multiple Gateways

The typical situation where you got one router and want to connect to two ISPs:
Dual gw 01.jpg
Of course, you want to do load balancing! There are several ways how to do it. Depending on the particular situation, you may find one best suited for you.

Policy Routing based on Client IP Address

If you have a number of hosts, you may group them by IP addresses. Then, depending on the source IP address, send the traffic out through Gateway #1 or #2. This is not really the best approach, giving you perfect load balancing, but it's easy to implement, and gives you some control too.
Let us assume we use for our workstations IP addresses from network 192.168.100.0/24. The IP addresses are assigned as follows:
  • 192.168.100.1-127 are used for Group A workstations
  • 192.168.100.128-253 are used for Group B workstations
  • 192.168.100.254 is used for the router.
All workstations have IP configuration with the IP address from the relevant group, they all have network mask 255.255.255.0, and 192.168.100.254 is the default gateway for them. We will talk about DNS servers later.
Now, when we have workstations divided into groups, we can refer to them using subnet addressing:
  • Group A is 192.168.100.0/25, i.e., addresses 192.168.100.0-127
  • Group B is 192.168.100.128/25, i.e., addresses 192.168.100.128-255
If you do not understand this, take the TCP/IP Basics course,
or, look for some resources about subnetting on the Internet!
We need to add two IP Firewall Mangle rules to mark the packets originated from Group A or Group B workstations.
For Group A, specify
  • Chain prerouting and Src. Address 192.168.100.0/25
  • Action mark routing and New Routing Mark GroupA.
Dual gw 22.jpg
It is a good practice to add a comment as well. Your mangle rules might be interesting for someone else and for yourself as well after some time.
For Group B, specify
  • Chain prerouting and Src. Address 192.168.100.128/25
  • Action mark routing and New Routing Mark GroupB
Dual gw 25.jpg
All IP traffic coming from workstations is marked with the routing marks GroupA or GroupB. We can use these marks in the routing table.
Next, we should specify two default routes (destination 0.0.0.0/0) with appropriate routing marks and gateways:
Dual gw 26.jpg
This thing is not going to work, unless you do masquerading for your LAN! The simplest way to do it is by adding one NAT rule for Src. Address 192.168.100.0/24 and Action masquerade:
Dual gw 28.jpg
Test the setup by tracing the route to some IP address on the Internet!
From a workstation of Group A, it should go like this:
C:\>tracert -d 8.8.8.8

Tracing route to 8.8.8.8 over a maximum of 30 hops

  1     2 ms     2 ms     2 ms  192.168.100.254
  2    10 ms     4 ms     3 ms  10.1.0.1
  ...
From a workstation of Group B, it should go like this:
C:\>tracert -d 8.8.8.8

Tracing route to 8.8.8.8 over a maximum of 30 hops

  1     2 ms     2 ms     2 ms  192.168.100.254
  2    10 ms     4 ms     3 ms  10.5.8.1
  ...
You can specify the DNS server for workstations quite freely, just make it can be reached (test it by tracing the route to DNS server's IP address)!
Setting Load Balancing Pada Mikrotik

Setting Load Balancing Pada Mikrotik

Konfigurasi Load Balancing Pada Mikrotik adalah teknik untuk mendistribusikan beban trafik pada dua atau lebih jalur koneksi secara seimbang, agar trafik dapat berjalan optimal, memaksimalkan throughput, memperkecil waktu tanggap dan menghindari overload pada salah satu jalur koneksi.Nah salah satu load balance pada mikrotik yang akan saya bahas pada tutorial ini adalah Load Balancing Menggunkan Metode Pcc.
Selama ini banyak dari kita yang beranggapan salah, bahwa dengan menggunakan loadbalance dua jalur koneksi , maka besar bandwidth yang akan kita dapatkan menjadi dua kali lipat dari bandwidth sebelum menggunakan loadbalance (akumulasi dari kedua bandwidth tersebut). Hal ini perlu kita perjelas dahulu, bahwa loadbalance tidak akan menambah besar bandwidth yang kita peroleh, tetapi hanya bertugas untuk membagi trafik dari kedua bandwidth tersebut agar dapat terpakai secara seimbang.
Pada artikel ini kami menggunakan RB433UAH dengan kondisi sebagai berikut :
1.    Ether1 dan Ether2 terhubung pada ISP yang berbeda dengan besar bandwdith yang berbeda. ISP1 sebesar 512kbps dan ISP2 sebesar 256kbps.
2.    Kita akan menggunakan web-proxy internal dan menggunakan openDNS.
3.    Mikrotik RouterOS anda menggunakan versi 4.5  karena fitur PCC mulai dikenal pada versi 3.24.
Jika pada kondisi diatas berbeda dengan kondisi jaringan ditempat anda, maka konfigurasi yang akan kita jabarkan disini harus anda sesuaikan dengan konfigurasi untuk jaringan ditempat anda.
Berikut gambar topologi jaringanya:
LoadBalance pcc
/ip address
add address=192.168.101.2/30 interface=ether1
add address=192.168.102.2/30 interface=ether2
add address=10.10.10.1/24 interface=wlan2
/ip dns
set allow-remote-requests=yes primary-dns=208.67.222.222 secondary-dns=208.67.220.220
Untuk koneksi client, kita menggunakan koneksi wireless pada wlan2 dengan range IP client 10.10.10.2 s/d 10.10.10.254 netmask 255.255.255.0, dimana IP 10.10.10.1 yang dipasangkan pada wlan2 berfungsi sebagai gateway dan dns server dari client. Jika anda menggunakan DNS dari salah satu isp anda, maka akan ada tambahan mangle yang akan kami berikan tanda tebal
Setelah pengkonfigurasian IP dan DNS sudah benar, kita harus memasangkan default route ke masing-masing IP gateway ISP kita agar router meneruskan semua trafik yang tidak terhubung padanya ke gateway tersebut. Disini kita menggunakan fitur check-gateway berguna jika salah satu gateway kita putus, maka koneksi akan dibelokkan ke gateway lainnya.
/ip route
add dst-address=0.0.0.0/0 gateway=192.168.101.1 distance=1 check-gateway=ping
add dst-address=0.0.0.0/0 gateway=192.168.102.1 distance=2 check-gateway=ping
Untuk pengaturan Access Point sehingga PC client dapat terhubung dengan wireless kita, kita menggunakan perintah
/interface wireless
set wlan2 mode=ap-bridge band=2.4ghz-b/g ssid=Mikrotik disabled=no
Agar pc client dapat melakukan koneksi ke internet, kita juga harus merubah IP privat client ke IP publik yang ada di interface publik kita yaitu ether1 dan ether2.
/ip firewall nat
add action=masquerade chain=srcnat out-interface=ether1
add action=masquerade chain=srcnat out-interface=ether2
Sampai langkah ini, router dan pc client sudah dapat melakukan koneksi internet. Lakukan ping baik dari router ataupun pc client ke internet. Jika belum berhasil, cek sekali lagi konfigurasi anda.
Webproxy Internal
Pada routerboard tertentu, seperti RB450G, RB433AH, RB433UAH, RB800 dan RB1100 mempunyai expansion slot (USB, MicroSD, CompactFlash) untuk storage tambahan. Pada contoh berikut, kita akan menggunakan usb flashdisk yang dipasangkan pada slot USB. Untuk pertama kali pemasangan, storage tambahan ini akan terbaca statusnya invalid di /system store. Agar dapat digunakan sebagai media penyimpan cache, maka storage harus diformat dahulu dan diaktifkan Nantinya kita tinggal mengaktifkan webproxy dan set cache-on-disk=yes untuk menggunakan media storage kita. Jangan lupa untuk membelokkan trafik HTTP (tcp port 80) kedalam webproxy kita.
/store disk format-drive usb1
/store
add disk=usb1 name=cache-usb type=web-proxy
activate cache-usb /ip proxy
set cache-on-disk=yes enabled=yes max-cache-size=200000KiB port=8080
/ip firewall nat
add chain=dstnat protocol=tcp dst-port=80 in-interface=wlan2 action=redirectto-ports=8080
Pengaturan Mangle
Pada loadbalancing kali ini kita akan menggunakan fitur yang disebut PCC (Per Connection Classifier). Dengan PCC kita bisa mengelompokan trafik koneksi yang melalui atau keluar masuk router menjadi beberapa kelompok. Pengelompokan ini bisa dibedakan berdasarkan src-address, dst-address, src-port dan atau dst-port. Router akan mengingat-ingat jalur gateway yang dilewati diawal trafik koneksi, sehingga pada paket-paket selanjutnya yang masih berkaitan dengan koneksi awalnya akan dilewatkan  pada jalur gateway yang sama juga. Kelebihan dari PCC ini yang menjawab banyaknya keluhan sering putusnya koneksi pada teknik loadbalancing lainnya sebelum adanya PCC karena perpindahan gateway..
Sebelum membuat mangle loadbalance, untuk mencegah terjadinya loop routing pada trafik, maka semua trafik client yang menuju network yang terhubung langsung dengan router, harus kita bypass dari loadbalancing. Kita bisa membuat daftar IP yang masih dalam satu network router dan  memasang mangle pertama kali sebagai berikut
/ip firewall address-list
add address=192.168.101.0/30 list=lokal
add address=192.168.102.0/30 list=lokal
add address=10.10.10.0/24 list=lokal /ip firewall mangle
add action=accept chain=prerouting dst-address-list=lokal in-interface=wlan2 comment=”trafik lokal”
add action=accept chain=output dst-address-list=lokal
Pada kasus tertentu, trafik pertama bisa berasal dari Internet, seperti penggunaan remote winbox atau telnet dari internet dan sebagainya, oleh karena itu kita juga memerlukan mark-connection untuk menandai trafik tersebut agar trafik baliknya juga bisa melewati interface dimana trafik itu masuk
/ip firewall mangle
add action=mark-connection chain=prerouting connection-mark=no-mark in-interface=ether1 new-connection-mark=con-from-isp1 passthrough=yes comment=”trafik dari isp1”
add action=mark-connection chain=prerouting connection-mark=no-mark in-interface=ether2 new-connection-mark=con-from-isp2 passthrough=yes comment=”trafik dari isp2”
Umumnya, sebuah ISP akan membatasi akses DNS servernya dari IP yang hanya dikenalnya, jadi jika anda menggunakan DNS dari salah satu ISP anda, anda harus menambahkan mangle agar trafik DNS tersebut melalui gateway ISP yang bersangkutan bukan melalui gateway ISP lainnya. Disini kami berikan mangle DNS ISP1 yang melalui gateway ISP1. Jika anda menggunakan publik DNS independent, seperti opendns, anda tidak memerlukan mangle dibawah ini.
/ip firewall mangle
add action=mark-connection chain=output comment=dns dst-address=202.65.112.21 dst-port=53 new-connection-mark=dns passthrough=yes protocol=tcp comment=”trafik DNS citra.net.id”
add action=mark-connection chain=output dst-address=202.65.112.21 dst-port=53 new-connection-mark=dns passthrough=yes protocol=udp
add action=mark-routing chain=output connection-mark=dns new-routing-mark=route-to-isp1 passthrough=no
Karena kita menggunakan webproxy pada router, maka trafik yang perlu kita loadbalance ada 2 jenis. Yang pertama adalah trafik dari client menuju internet (non HTTP), dan trafik dari webproxy menuju internet. Agar lebih terstruktur dan mudah dalam pembacaannya, kita akan menggunakan custom-chain sebagai berikut :
/ip firewall mangle
add action=jump chain=prerouting comment=”lompat ke client-lb” connection-mark=no-mark in-interface=wlan2 jump-target=client-lb
add action=jump chain=output comment=”lompat ke lb-proxy” connection-mark=no-mark out-interface=!wlan2 jump-target=lb-proxy
Pada mangle diatas, untuk trafik loadbalance client pastikan parameter in-interface adalah interface yang terhubung dengan client, dan untuk trafik loadbalance webproxy, kita menggunakan chain output dengan parameter out-interface yang bukan terhubung ke interface client. Setelah custom chain untuk loadbalancing dibuat, kita bisa membuat mangle di custom chain tersebut sebagai berikut
/ip firewall mangle
add action=mark-connection chain=client-lb dst-address-type=!local new-connection-mark=to-isp1 passthrough=yes per-connection-classifier=both-addresses:3/0 comment=”awal loadbalancing klien”
add action=mark-connection chain=client-lb dst-address-type=!local new-connection-mark=to-isp1 passthrough=yes per-connection-classifier=both-addresses:3/1
add action=mark-connection chain=client-lb dst-address-type=!local new-connection-mark=to-isp2 passthrough=yes per-connection-classifier=both-addresses:3/2
add action=return chain=client-lb comment=”akhir dari loadbalancing” /ip firewall mangle
add action=mark-connection chain=lb-proxy dst-address-type=!local new-connection-mark=con-from-isp1 passthrough=yes per-connection-classifier=both-addresses:3/0 comment=”awal load balancing proxy”
add action=mark-connection chain=lb-proxy dst-address-type=!local new-connection-mark=con-from-isp1 passthrough=yes per-connection-classifier=both-addresses:3/1
add action=mark-connection chain=lb-proxy dst-address-type=!local new-connection-mark=con-from-isp2 passthrough=yes per-connection-classifier=both-addresses:3/2
add action=return chain=lb-proxy comment=”akhir dari loadbalancing”
Untuk contoh diatas, pada loadbalancing client dan webproxy menggunakan parameter pemisahan trafik pcc yang sama, yaitu both-address, sehingga router akan mengingat-ingat berdasarkan src-address dan dst-address dari sebuah koneksi. Karena trafik ISP kita yang berbeda (512kbps dan 256kbps), kita membagi beban trafiknya menjadi 3 bagian. 2 bagian pertama akan melewati gateway ISP1, dan 1 bagian terakhir akan melewati gateway ISP2. Jika masing-masing trafik dari client dan proxy sudah ditandai, langkah berikutnya kita tinggal membuat mangle mark-route yang akan digunakan dalam proses routing nantinya
/ip firewall mangle
add action=jump chain=prerouting comment=”marking route client” connection-mark=!no-mark in-interface=wlan2 jump-target=route-client
add action=mark-routing chain=route-client connection-mark=to-isp1 new-routing-mark=route-to-isp1 passthrough=no
add action=mark-routing chain=route-client connection-mark=to-isp2 new-routing-mark=route-to-isp2 passthrough=no
add action=mark-routing chain=route-client connection-mark=con-from-isp1 new-routing-mark=route-to-isp1 passthrough=no
add action=mark-routing chain=route-client connection-mark=con-from-isp2 new-routing-mark=route-to-isp2 passthrough=no
add action=return chain=route-client disabled=no /ip firewall mangle
add action=mark-routing chain=output comment=”marking route proxy” connection-mark=con-from-isp1 new-routing-mark=route-to-isp1 out-interface=!wlan2 passthrough=no
add action=mark-routing chain=output connection-mark=con-from-isp2 new-routing-mark=route-to-isp2 out-interface=!wlan2 passthrough=no
Pengaturan Routing
Pengaturan mangle diatas tidak akan berguna jika anda belum membuat routing berdasar mark-route yang sudah kita buat. Disini kita juga akan membuat routing backup, sehingga apabila sebuah gateway terputus, maka semua koneksi akan melewati gateway yang masing terhubung
/ip route
add check-gateway=ping dst-address=0.0.0.0/0 gateway=192.168.101.1 routing-mark=route-to-isp1 distance=1
add check-gateway=ping dst-address=0.0.0.0/0 gateway=192.168.102.1 routing-mark=route-to-isp1 distance=2
add check-gateway=ping dst-address=0.0.0.0/0 gateway=192.168.102.1 routing-mark=route-to-isp2 distance=1
add check-gateway=ping dst-address=0.0.0.0/0 gateway=192.168.101.1 routing-mark=route-to-isp2 distance=2
Pengujian
Dari hasil pengujian kami, didapatkan sebagai berikut
LoadBalance
Demikinlah teman-teman Tutorial Load Balancing Pada Mikrotik yang dapat saya berikan semoga teman-teman dapat mencoba dan mau mengimplementasikanny, khusunya dengan menggunkan metode pcc ini
Load Balancing Mikrotik 2 Speedy dengan PCC

Load Balancing Mikrotik 2 Speedy dengan PCC

Load Balancing Mikrotik 2 Speedy dengan PCC
keterangan
----------------
interface :
1. Lokal
2. Speedy-1
3. Speedy-2

ip modem:
Speedy-1 = 10.112.0.1
Speedy-2 = 10.111.0.1

--------------------------------------------------------------------------------
/ip address
add address=192.168.88.1/24 network=192.168.88.0 broadcast=192.168.88.255 interface=Lokal
add address=10.112.0.2/24 network=10.112.0.0 broadcast=10.112.0.255 interface=Speedy-1
add address=10.111.0.2/24 network=10.111.0.0 broadcast=10.111.0.255 interface=Speedy-2

/ip firewall mangle
add action=mark-connection chain=input comment="NEW Load Balance" connection-state=new disabled=no in-interface=Speedy-1 new-connection-mark=ADSL-1 passthrough=yes
add action=mark-connection chain=input comment="" connection-state=new disabled=no in-interface=Speedy-2 new-connection-mark=ADSL-2 passthrough=yes

add action=mark-routing chain=output comment="" connection-mark=ADSL-1 disabled=no new-routing-mark=jalur-1 passthrough=no
add action=mark-routing chain=output comment="" connection-mark=ADSL-2 disabled=no new-routing-mark=jalur-2 passthrough=no

add action=mark-connection chain=prerouting comment="" disabled=no dst-address-type=!local in-interface=Lokal new-connection-mark=ADSL-1 passthrough=yes per-connection-classifier=both-addresses-and-ports:2/0
add action=mark-connection chain=prerouting comment="" disabled=no dst-address-type=!local in-interface=Lokal new-connection-mark=ADSL-2 passthrough=yes per-connection-classifier=both-addresses-and-ports:2/1

add action=mark-routing chain=prerouting comment="" connection-mark=ADSL-1 disabled=no in-interface=Lokal new-routing-mark=jalur-1 passthrough=yes
add action=mark-routing chain=prerouting comment="" connection-mark=ADSL-2 disabled=no in-interface=Lokal new-routing-mark=jalur-2 passthrough=yes

/ip firewall nat
add chain=srcnat action=masquerade out-interface=Speedy-1 comment="" disabled=no
add chain=srcnat action=masquerade out-interface=Speedy-2 comment="" disabled=no

/ip route
add disabled=no distance=1 dst-address=0.0.0.0/0 gateway=10.112.0.1 routing-mark=jalur-1
add disabled=no distance=1 dst-address=0.0.0.0/0 gateway=10.111.0.1 routing-mark=jalur-2

add comment="" disabled=no distance=1 dst-address=0.0.0.0/0 gateway=10.111.0.1
add comment="" disabled=no distance=1 dst-address=0.0.0.0/0 gateway=10.112.0.1
add comment="" disabled=no distance=2 dst-address=0.0.0.0/0 gateway=10.111.0.1


atau pakai setingan yang ini untuk loanding balance


add ip address Local dan Wan

/ ip address
add address=10.10.0.1/24 network=10.10.0.0 broadcast=10.10.0.255 interface=client
add address=192.168.1.2/24 network=192.168.1.0 broadcast=192.168.1.255 interface=speedy1
add address=192.168.2.2/24 network=192.168.2.0 broadcast=192.168.2.255 interface=speedy2

Setting Routing Gateway

/ ip route
add dst-address=0.0.0.0/0 gateway=192.168.1.1,192.168.2.1 check-gateway=ping

Setting Firewall Nat

/ip firewall nat
add chain=srcnat out-interface=speedy1 action=masquerade
add chain=srcnat out-interface=speedy2 action=masquerade

Setting Balancing dengan firewall mangle

/ ip firewall mangle
add chain=input in-interface=speedy1 action=mark-connection new-connection-mark=speedy1_conn
add chain=input in-interface=speedy2 action=mark-connection new-connection-mark=speedy2_conn
add chain=output connection-mark=speedy1_conn action=mark-routing new-routing-mark=to_speedy1
add chain=output connection-mark=speedy2_conn action=mark-routing new-routing-mark=to_speedy2

Setting Balancing routing

/ ip route
add dst-address=0.0.0.0/0 gateway=192.168.1.1 routing-mark=to_speedy1
add dst-address=0.0.0.0/0 gateway=192.168.2.1 routing-mark=to_speedy2
Setting Warnet Speedy dengan Mikrotik RB750

Setting Warnet Speedy dengan Mikrotik RB750

Membangun Warnet ADSL Speedy dengan Mikrotik RB750
Konfigurasi Interface Mikrotik

Klik menu Interface
Lalu ganti nama interface default Mikrotik RB750
Interface port 1 dan port 2 ganti namanya :
Port 1 : ToModem
Port 2 : ToSwitch
[admin@MikroTik] > /interface print
Flags: D – dynamic, X – disabled, R – running, S – slave
# NAME TYPE MTU L2MTU
0 R ;;; Interface ke Modem
ToModem ether 1500 1526
1 R ;;; Interface ke Switch
ToSwitch ether 1500 1524
2 ether3-local-slave ether 1500 1524
3 ether4-local-slave ether 1500 1524
4 ether5-local-slave ether 1500 1524
Konfigurasi IP Address
Klik menu IP > Address
Masukkan IP Address ke Interface ToModem : 192.168.1.2/24
Ulangi langkah diatas untuk IP Address ke Interface ToSwitch : 192.168.0.1/24
[admin@MikroTik] > /ip address print
Flags: X – disabled, I – invalid, D – dynamic
# ADDRESS NETWORK BROADCAST INTERFACE
0 192.168.1.2/24 192.168.1.0 192.168.1.255 ToModem
1 192.168.0.1/24 192.168.0.0 192.168.0.255 ToSwitch
Konfigurasi Gateway
Klik menu IP > Routes
Set gateway ke IP Modem 192.168.1.1
[admin@MikroTik] > /ip route print
Flags: X – disabled, A – active, D – dynamic,
C – connect, S – static, r – rip, b – bgp, o – ospf, m – mme,
B – blackhole, U – unreachable, P – prohibit
# DST-ADDRESS PREF-SRC GATEWAY DISTANCE
0 A S 0.0.0.0/0 192.168.1.1 1
1 ADC 192.168.0.0/24 192.168.0.1 ToSwitch 0
2 ADC 192.168.1.0/24 192.168.1.2 ToModem 0
Konfigurasi DNS Server
Klik Menu IP > DNS
Set DNS Primary : 203.130.208.18, Secondary DNS : 203.130.196.155
[admin@MikroTik] > /ip dns print
servers: 203.130.208.18, 203.130.196.155
allow-remote-requests: yes
max-udp-packet-size: 512
cache-size: 2048KiB
cache-max-ttl: 1w
cache-used: 6KiB
Konfigurasi NAT
Klik menu IP > Firewall
Cek secara default sudah ada NAT Masquerade
[admin@MikroTik] > /ip firewall nat print
Flags: X – disabled, I – invalid, D – dynamic
0 ;;; default configuration
chain=srcnat action=masquerade out-interface=ToModem